
All articles
Tips for using KnowledgeOwl in an ever-changing environment
Here are some suggestions on tweaks or features you can use in KnowledgeOwl to help streamline some of those new processes.
Published
Category
Tips for using KnowledgeOwl in an ever-changing environment
Kate Mueller | March 20, 2020
We know that a lot of work has suddenly shifted online, and many of you are hurrying to spin up new knowledge bases or adding new user populations to your existing knowledge bases. We wanted to offer some suggestions on tweaks or features you can use in KnowledgeOwl to help streamline some of those new processes.
In this post, we outline how to:
Add a banner to your knowledge base homepage
Use a blog style category to track news/updates
Enable subscriptions so that your subscribers can receive email notifications when you post updates to content
Segregate content to different reader groups
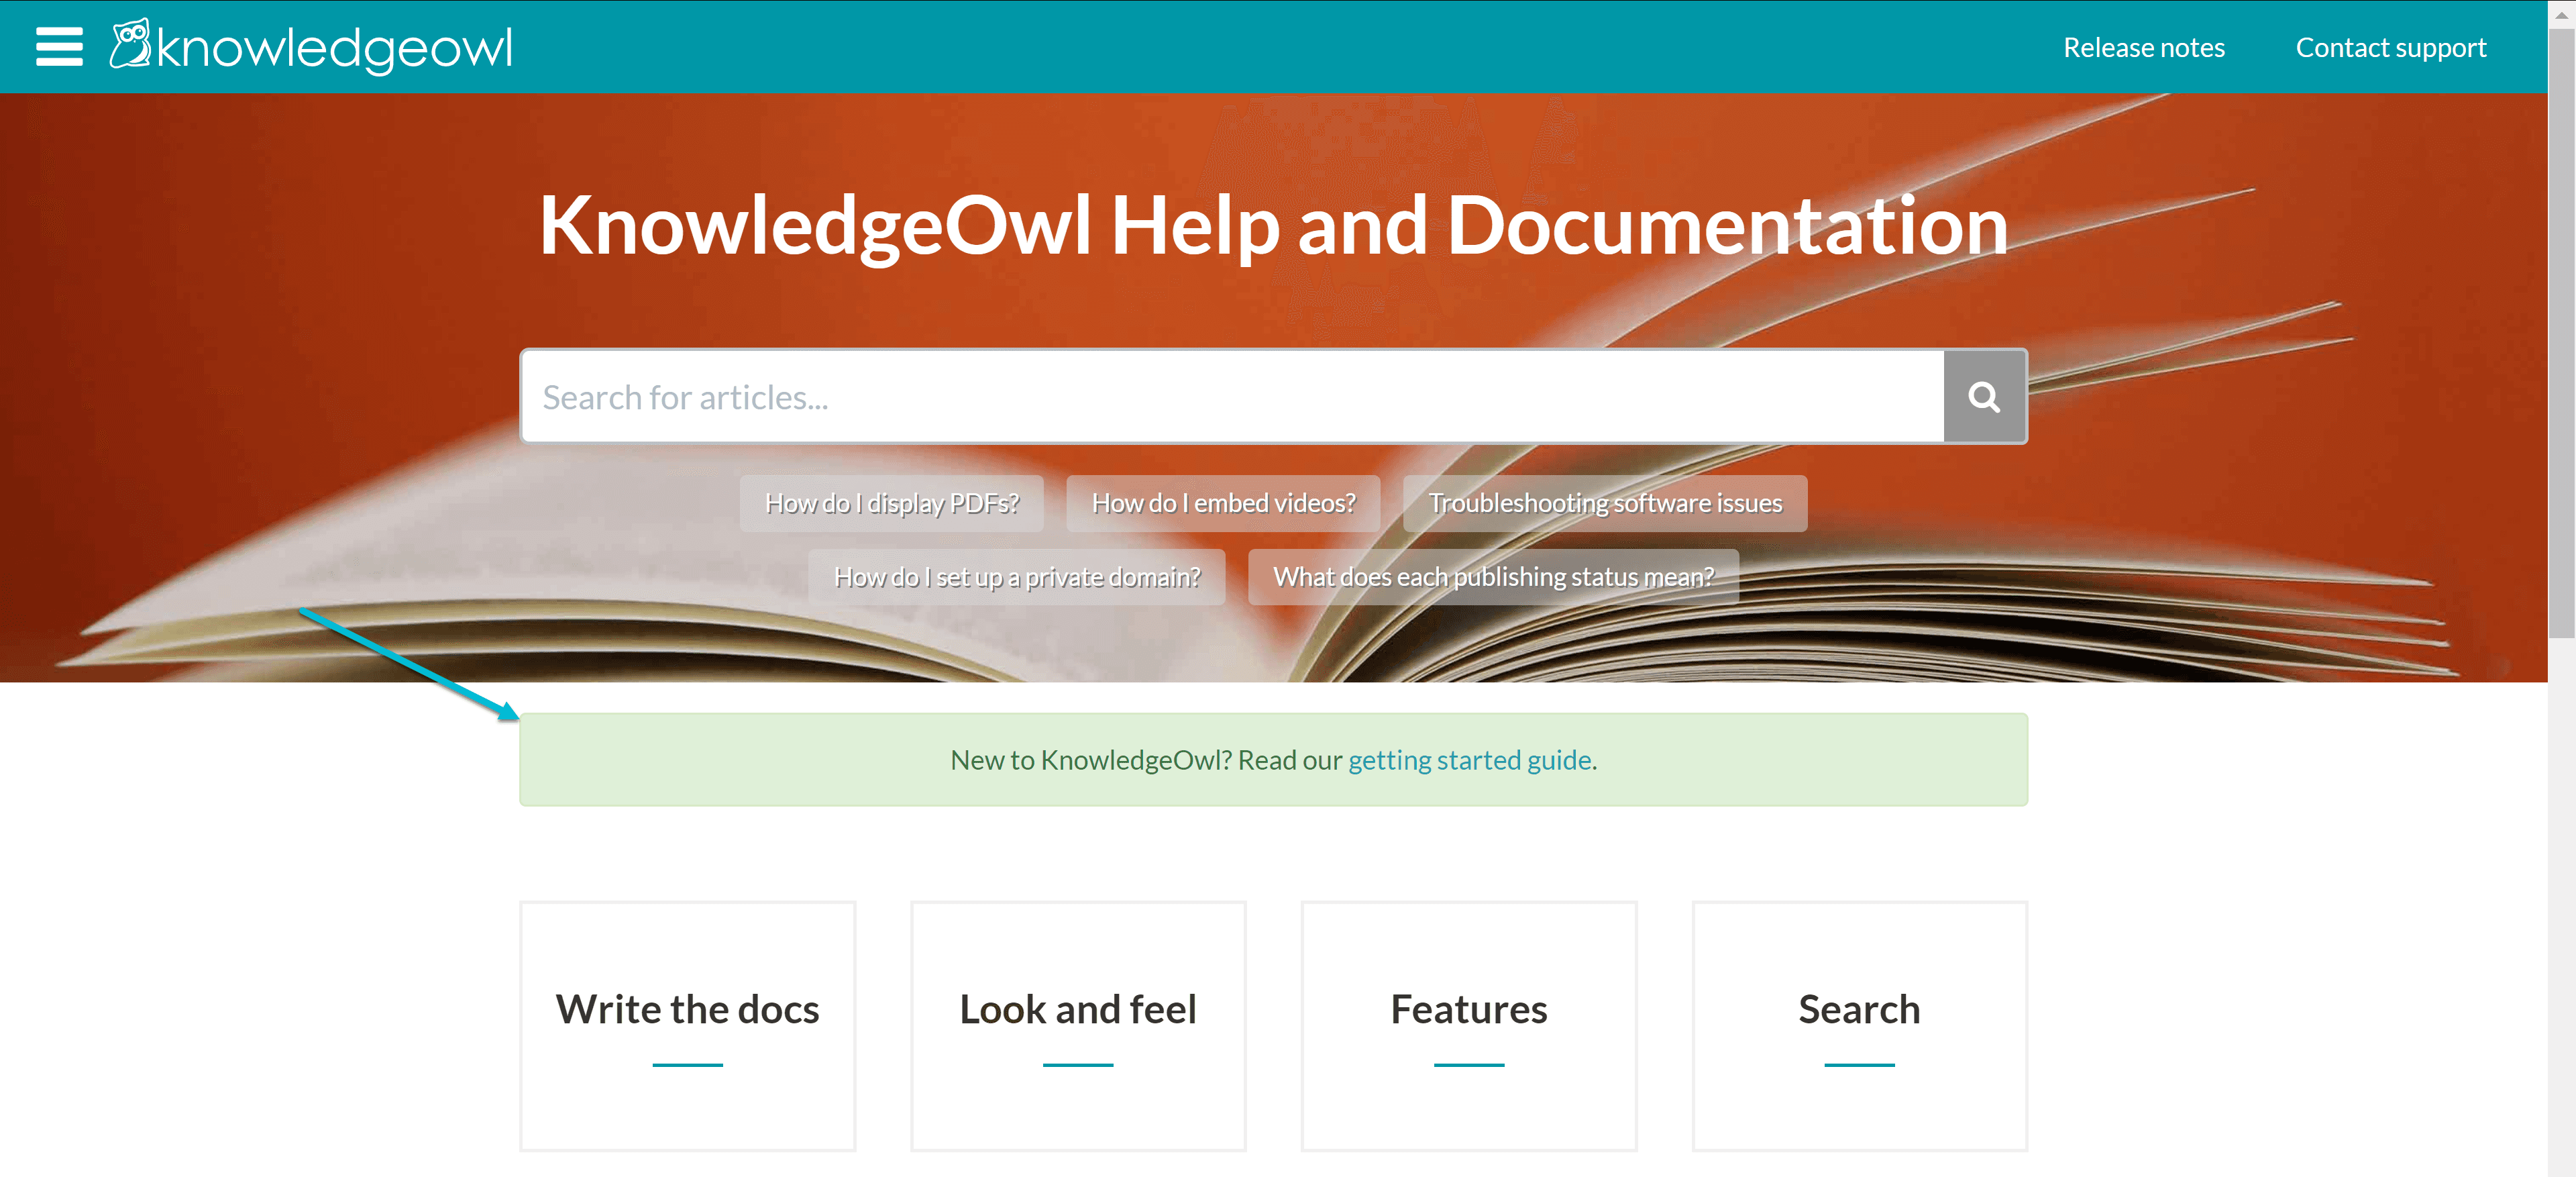
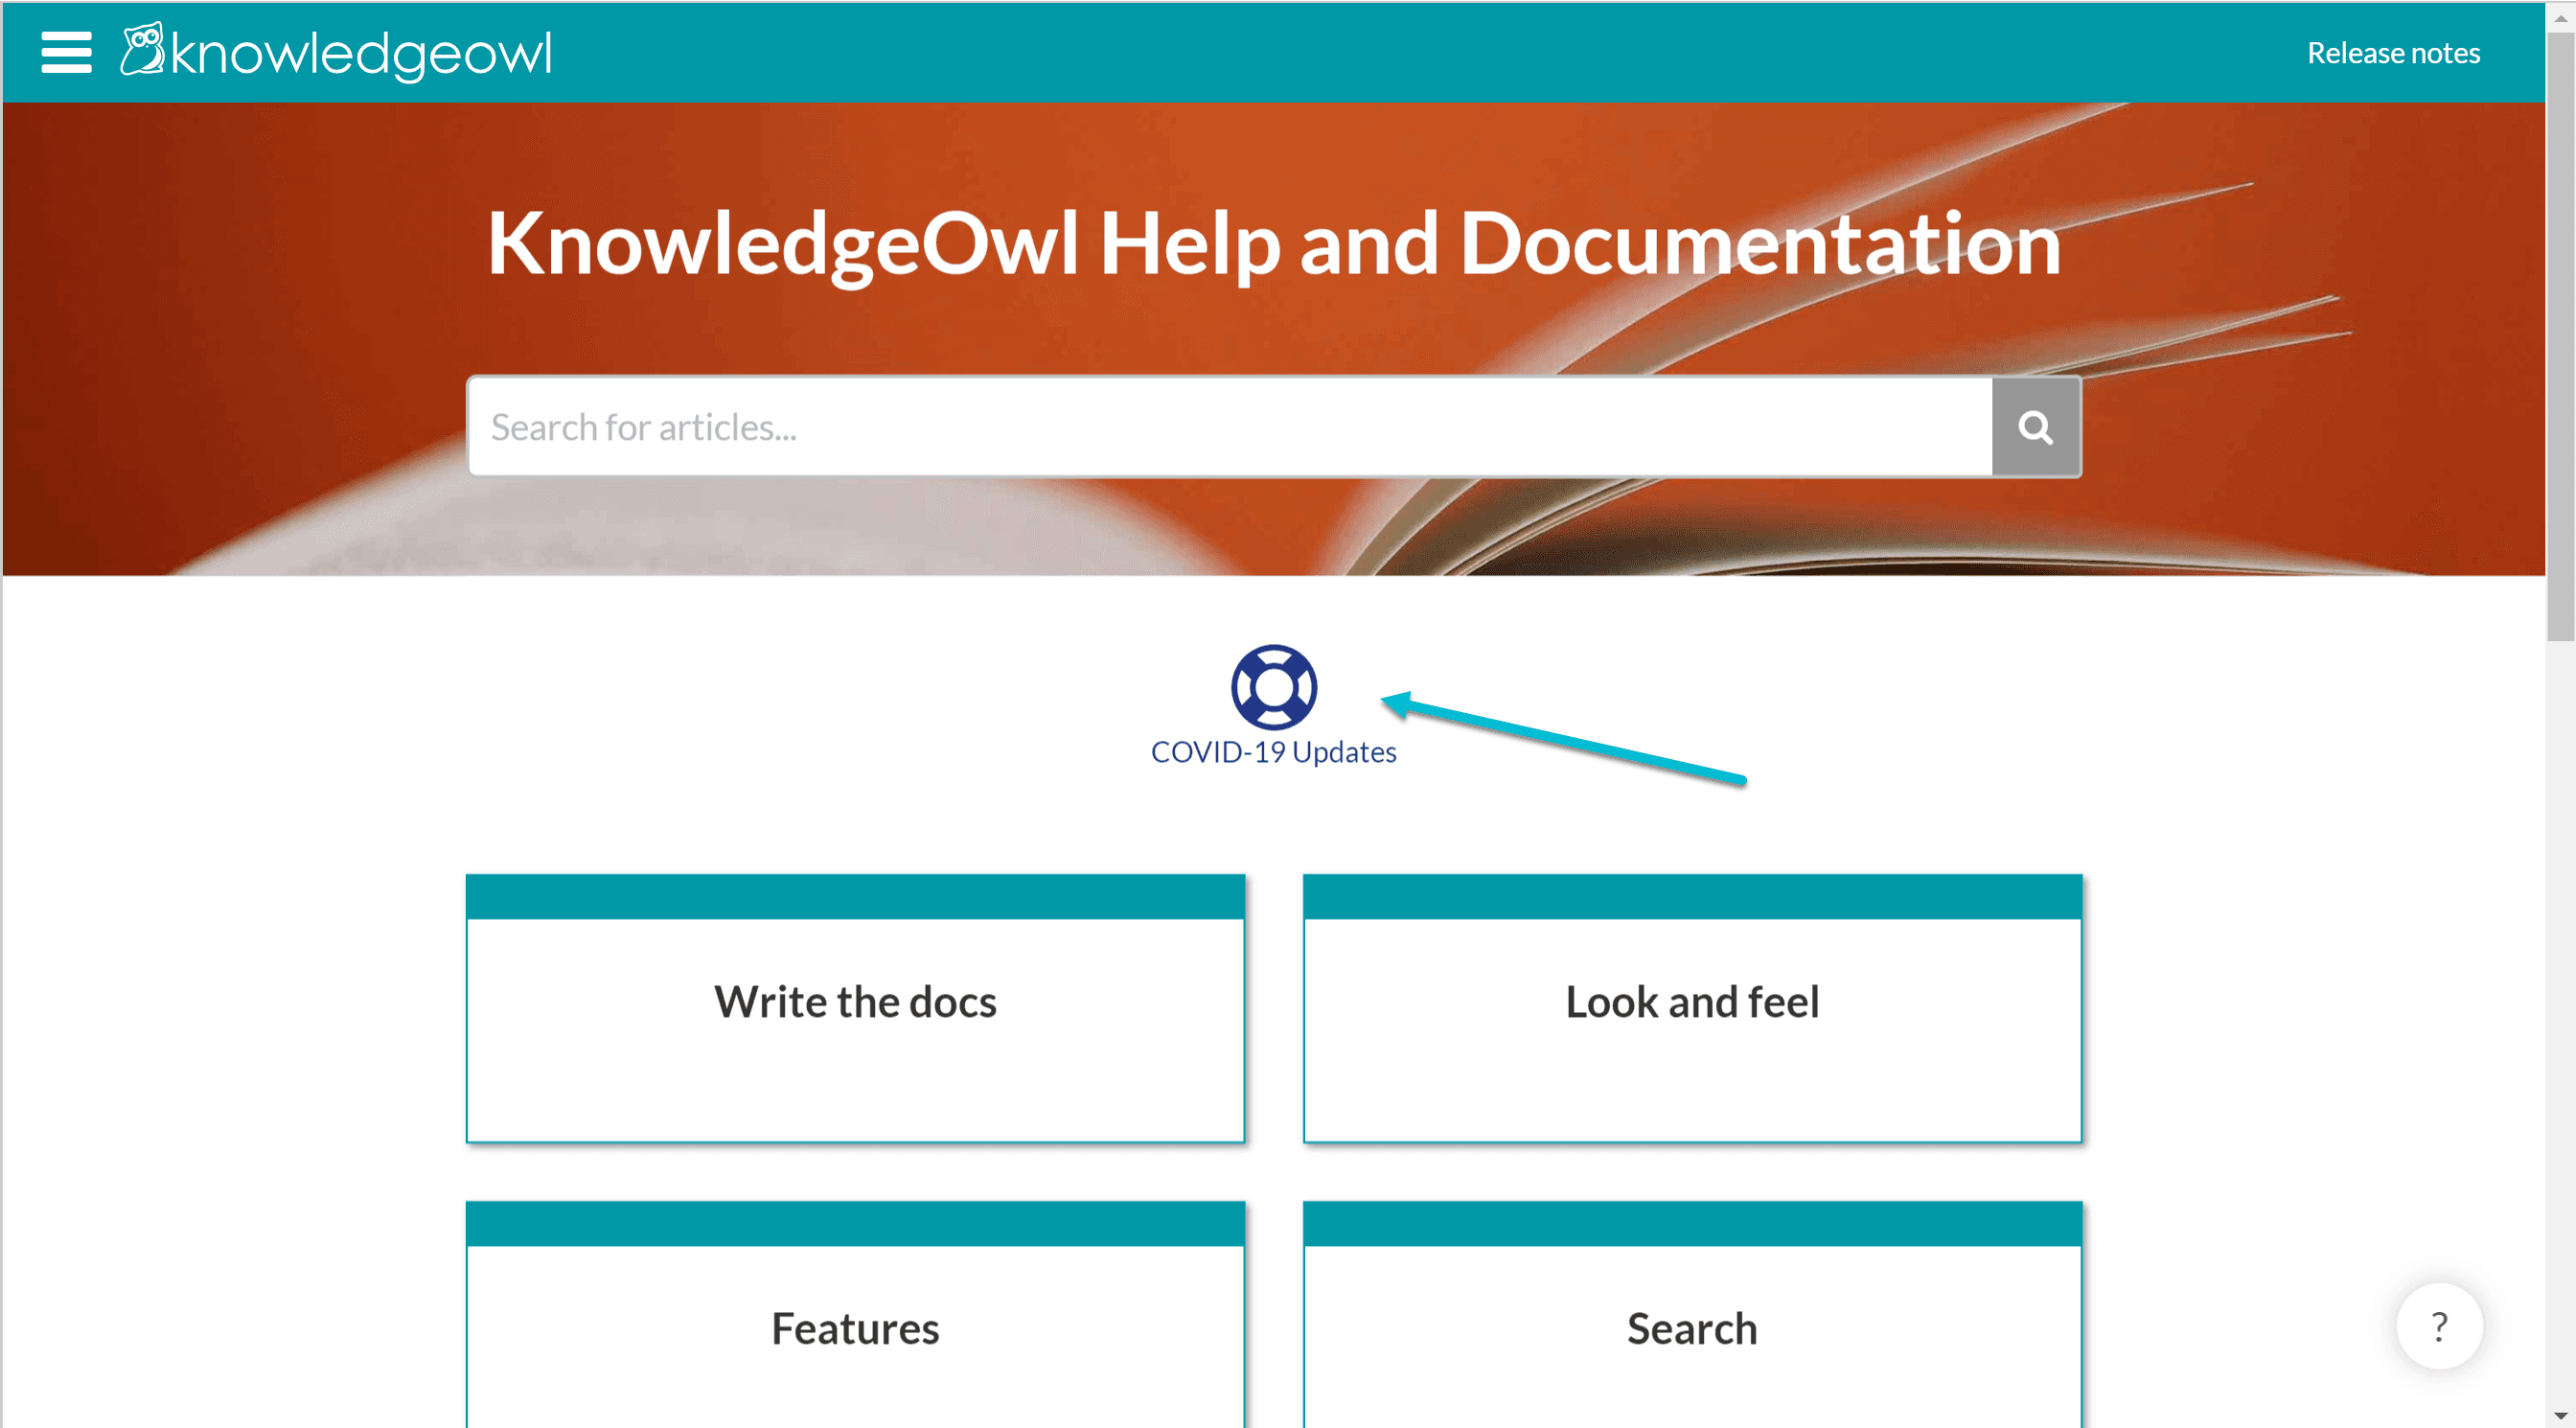
Add a banner or custom icon link to your home page
We've had a number of customers reach out to ask for help adding a banner or message to their homepage. This can be an easy way to get COVID-19 policies or news front-and-center on your knowledge base. There are a number of ways to do this. We've created documentation on two.
Option 1: Leverage the existing Div styles to add a banner
This option uses the alert or well styles, like we do here:
Pros: this keeps your banner consistently styled with other call-outs. This is especially useful if you're not familiar with styling in HTML and CSS or you want something fast/easy. If you have custom styles in place already to change the color on these alerts, this banner will automatically inherit those, too. These divs have the built-in color background, lightly rounded corners, and a border.
Cons: These aren't the fanciest divs on the planet. If you have specific branding in your knowledge base, you're likely better off creating a div from scratch.
Check out the documentation to try this option for yourself.
Option 2: Use an icon + text to add a custom link
Rather than a banner, you can insert a custom icon + text link to your home page, as shown below:
We've created a snippet that will construct most of this for you, and info on how to update the colors, text, and icon that are used.
Pros: the icon and link can make this stand out and give you more flexibility for where you can place this. Our sample code leverages FontAwesome icons, so you can replace the icon code with one of your choice and update the colors to match your branding.
Cons: this approach doesn't visually make sense for all layouts.
Check out the documentation to try this option for yourself.
Track and share updates with a blog style category
Blog style categories are designed for frequent, time-based posts. They automatically display articles in reverse chronological order, keeping the most recent posts on top, and they'll show a short article blurb. You can see these settings in action in our Release Notes.
If you need to share frequent updates, policies, or news relating to COVID-19 or to your suddenly working from home coworkers, these can be a great way to communicate that information. Building from our example above, the COVID-19 Updates link could be a link to a blog style category detailing our updates.
To set this up, create a new category and select Blog style as the category type. Call it whatever you'd like. Click Add and Edit.

Blog style category creation
When you get to the category details screen, add a Category Description, set the number of articles you'd like to appear per page, and be sure Reverse chronological order is selected before you Save.
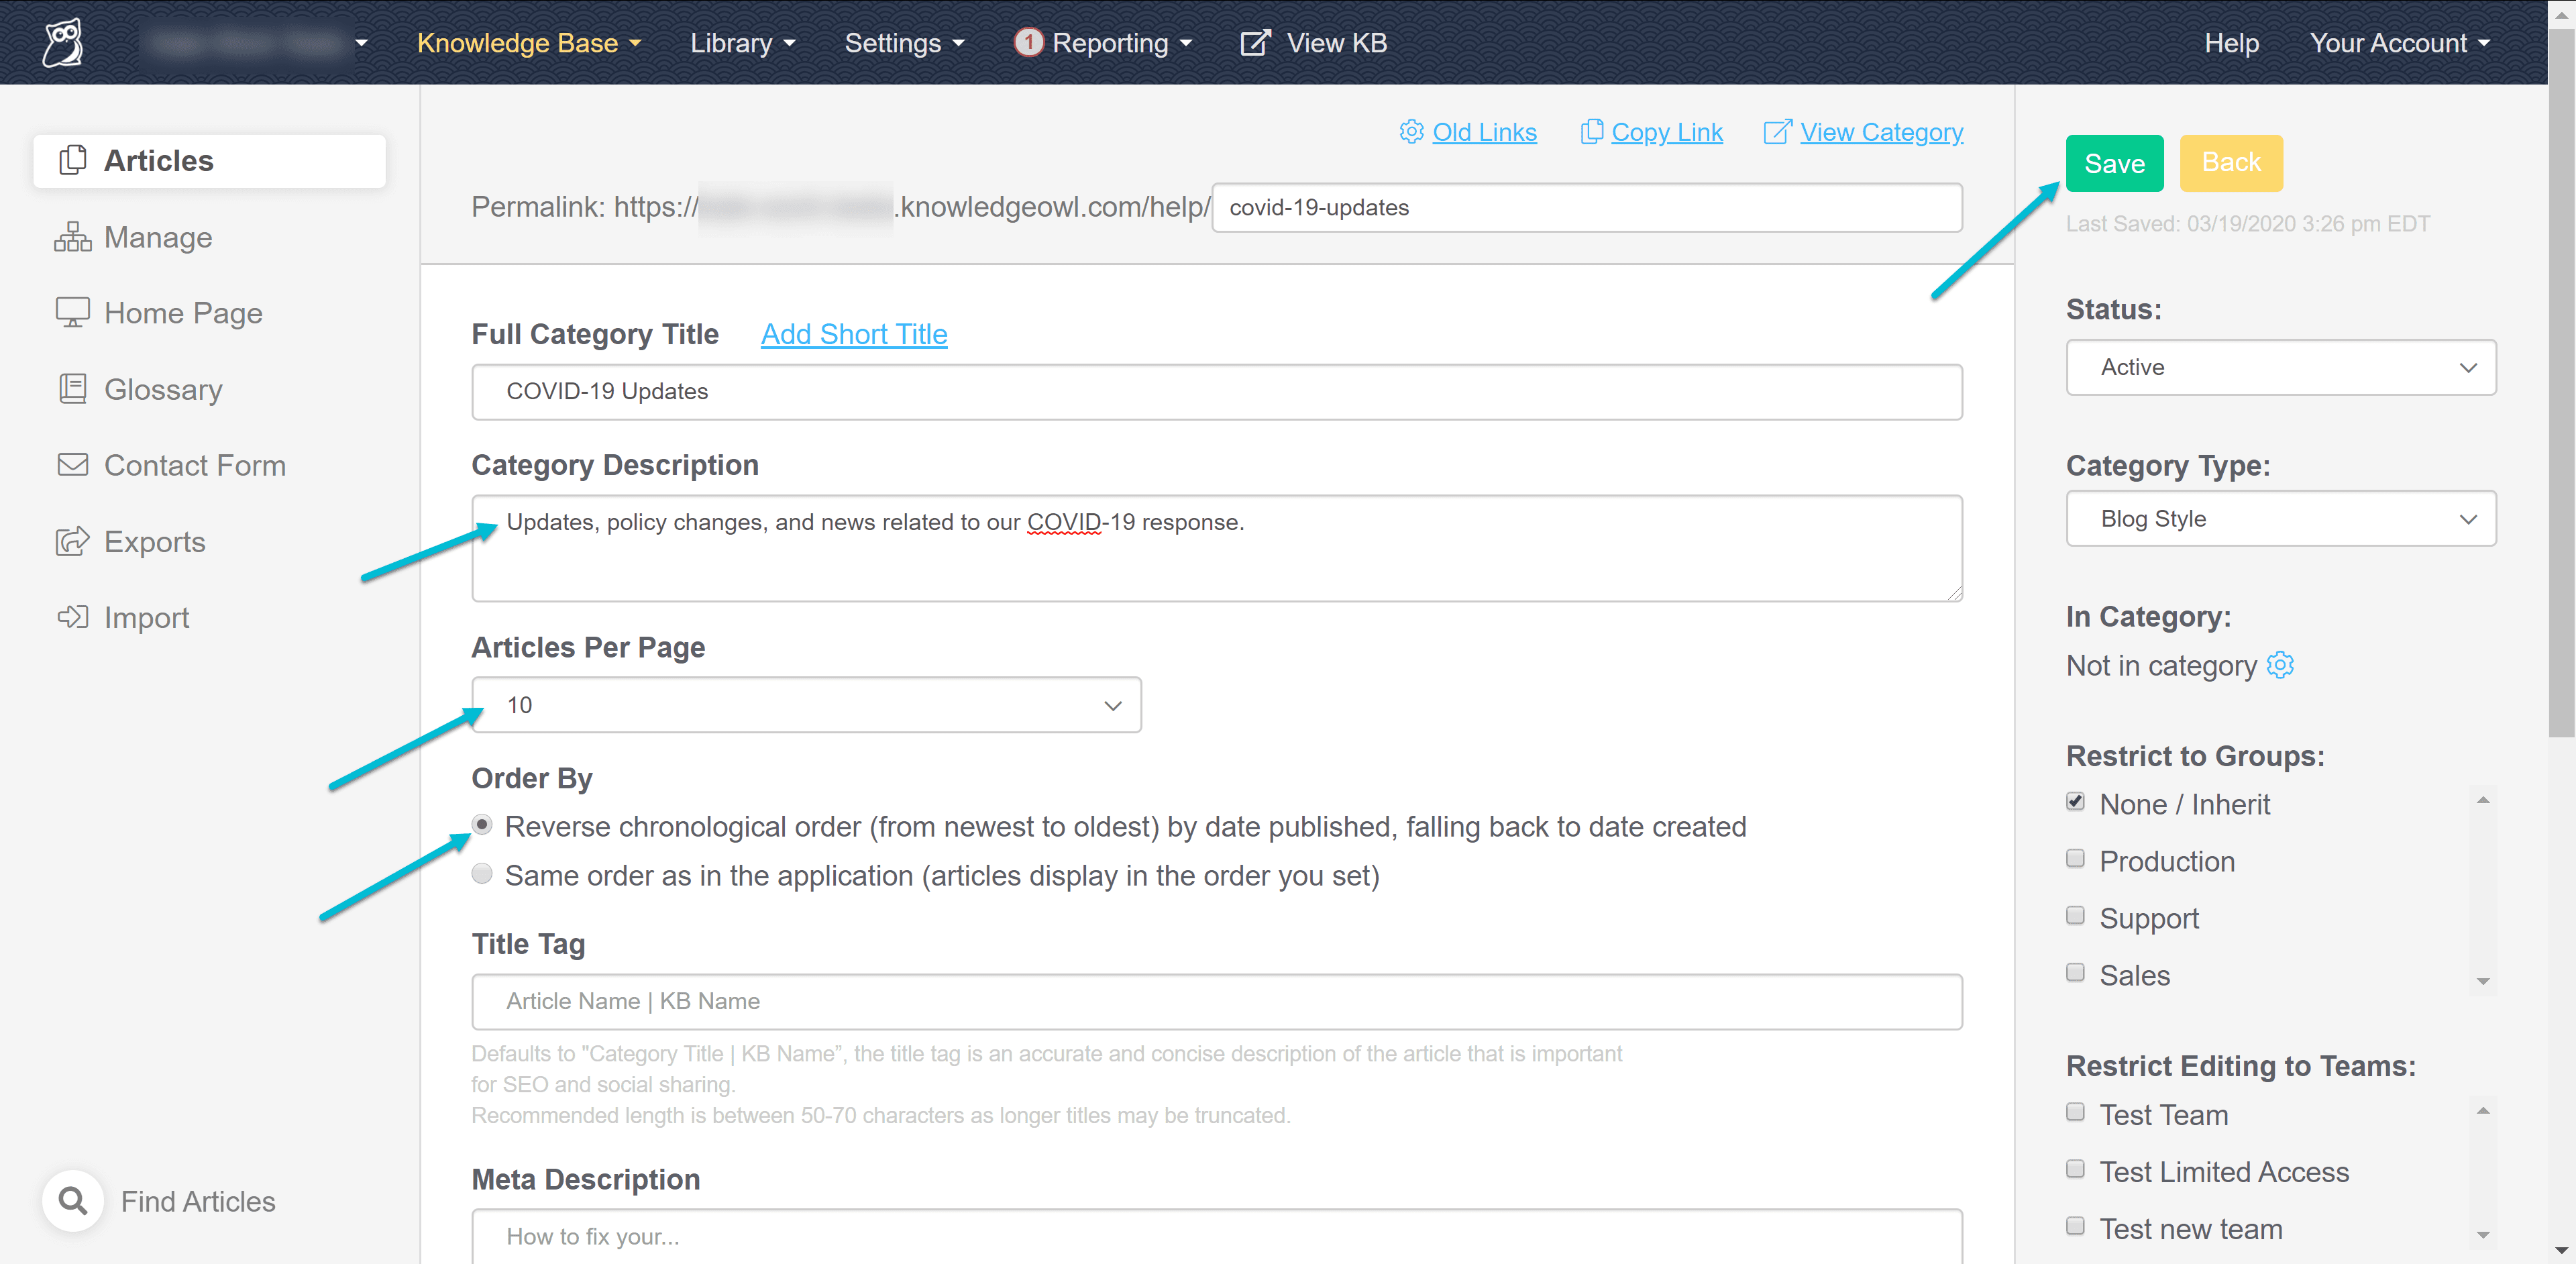
Blog style category configuration
When you create articles in this category, give them a Published date by clicking the link for Add published date underneath the Publishing Status. This helps the category sort and display the articles in reverse chronological order.
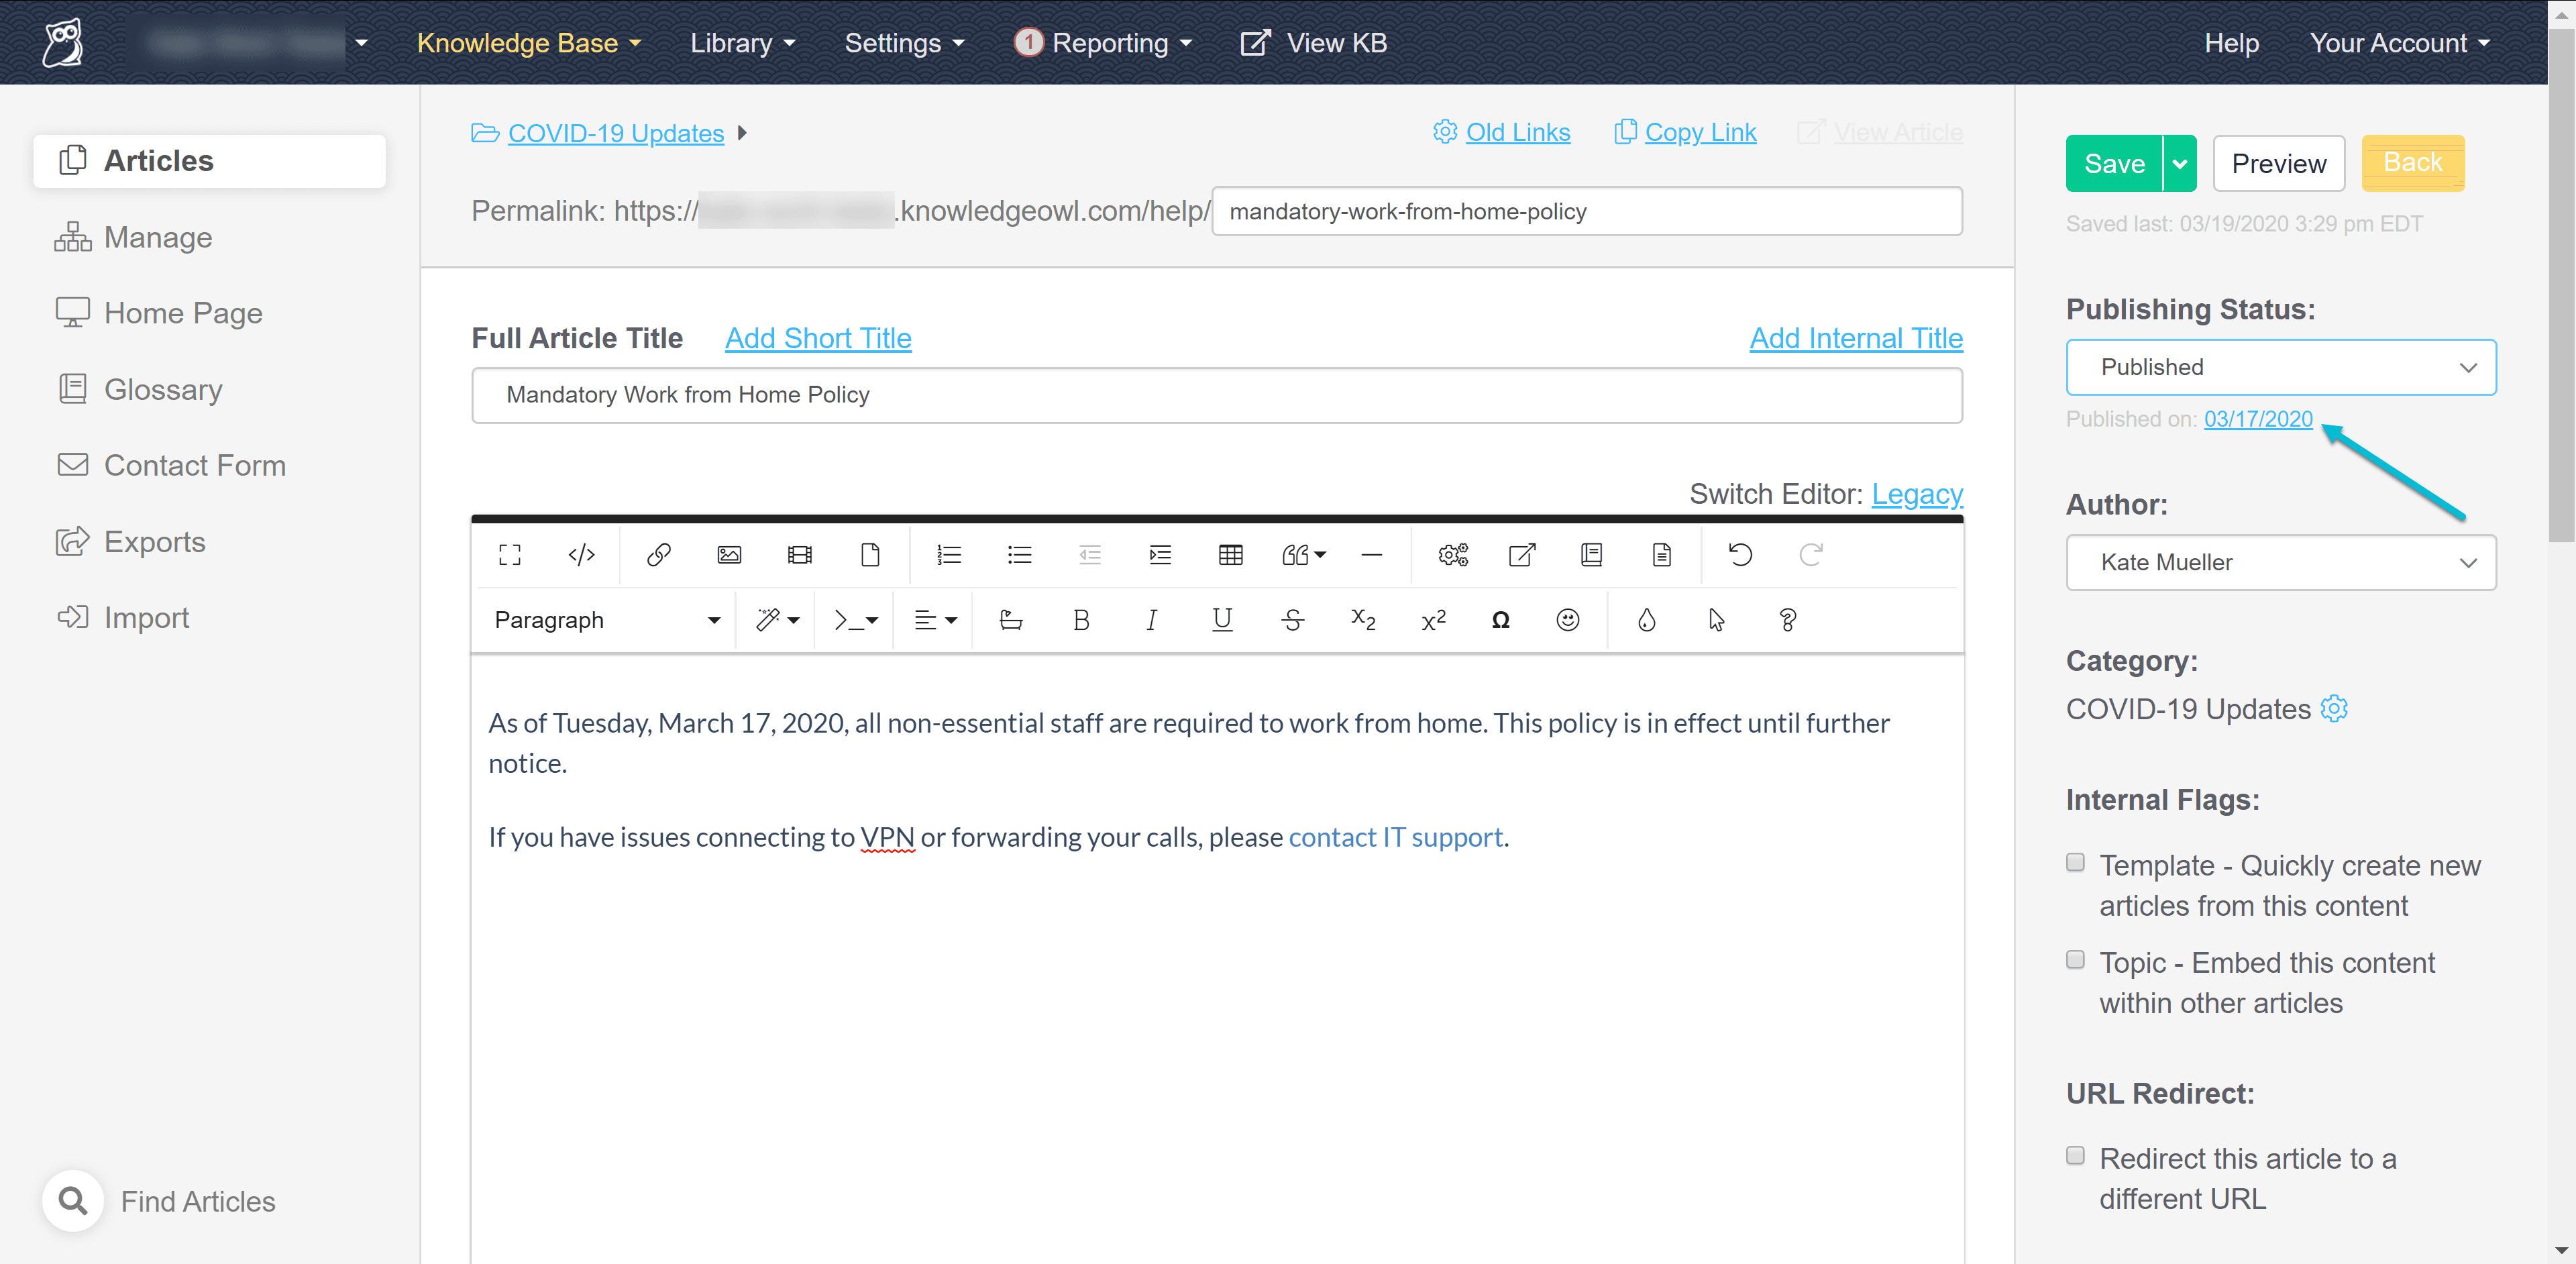
Adding a published date helps the blog style category properly sort and display
Here's a sample blog-style category laid out this way. Note the category description appears underneath the category's title, and the first couple hundred characters of each article appear in the blurb below each article title (if you use article Meta Descriptions, those will appear here instead):
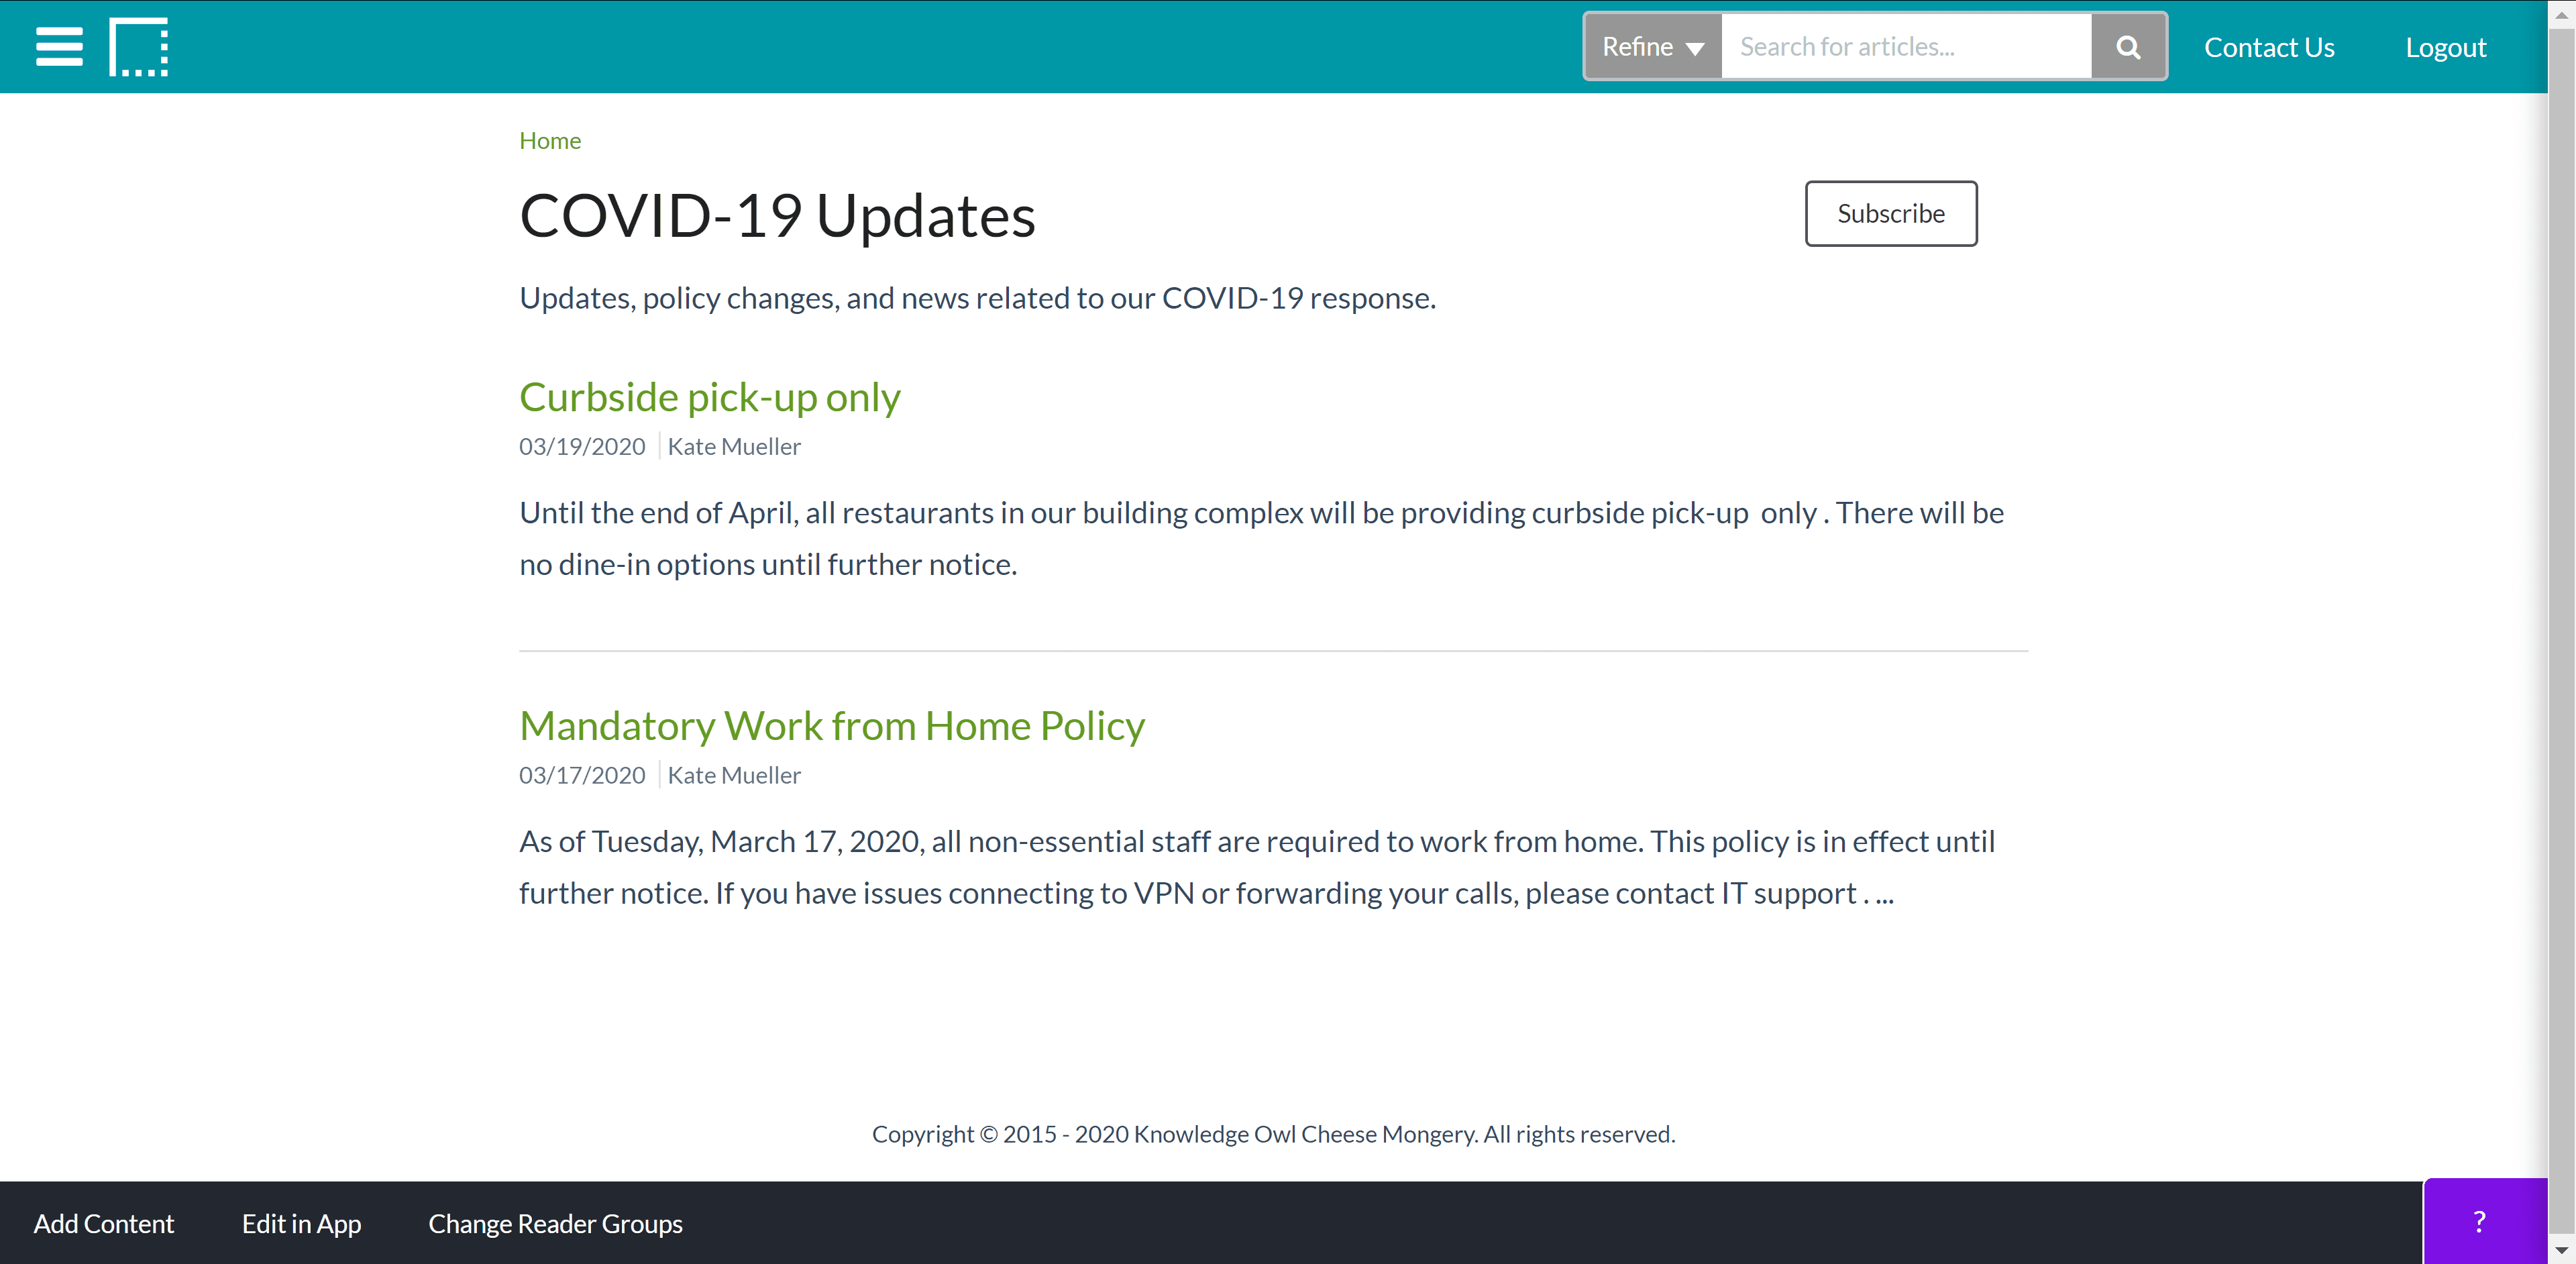
Sample blog style category
For more info on blog-style categories, see our help documentation on them.
Subscription notifications
You may have noticed the Subscribe button in my last screenshot above. If you'd like your readers to stay informed on updates to your knowledge base, you can enable Subscriptions. Subscriptions allow you to send automatic email notifications of a) new and b) updated content in your knowledge base. Readers subscribe to one or more categories and will receive email notifications on a daily or weekly basis (depending on how you configure the subscription notifications).
You decide when an article is classified as "New" or "Updated" by setting the New and Updated article call-outs in the editor, so you have a great deal of control over which articles will be included in notifications and which won't.
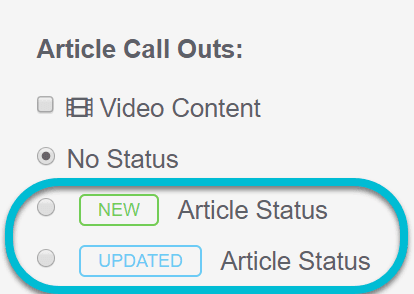
New and Updated Article Call Outs trigger subscription notifications
For more information on configuring and using subscriptions, see our help documentation.
Segregating content
You may suddenly have a lot more coworkers, staff, contractors, students, or faculty accessing your knowledge base. In some cases you need to segregate content so that certain people only see certain things.
To set this up, you'll use Reader Groups. The overall process is:
Go to Your Account > Readers, click on Groups, and create appropriate groups for each audience group you have. (Note: if you're using a Single Sign-On integration and you can pass group membership with that authentication, you'll need to name the groups here to match what's in your SSO.)
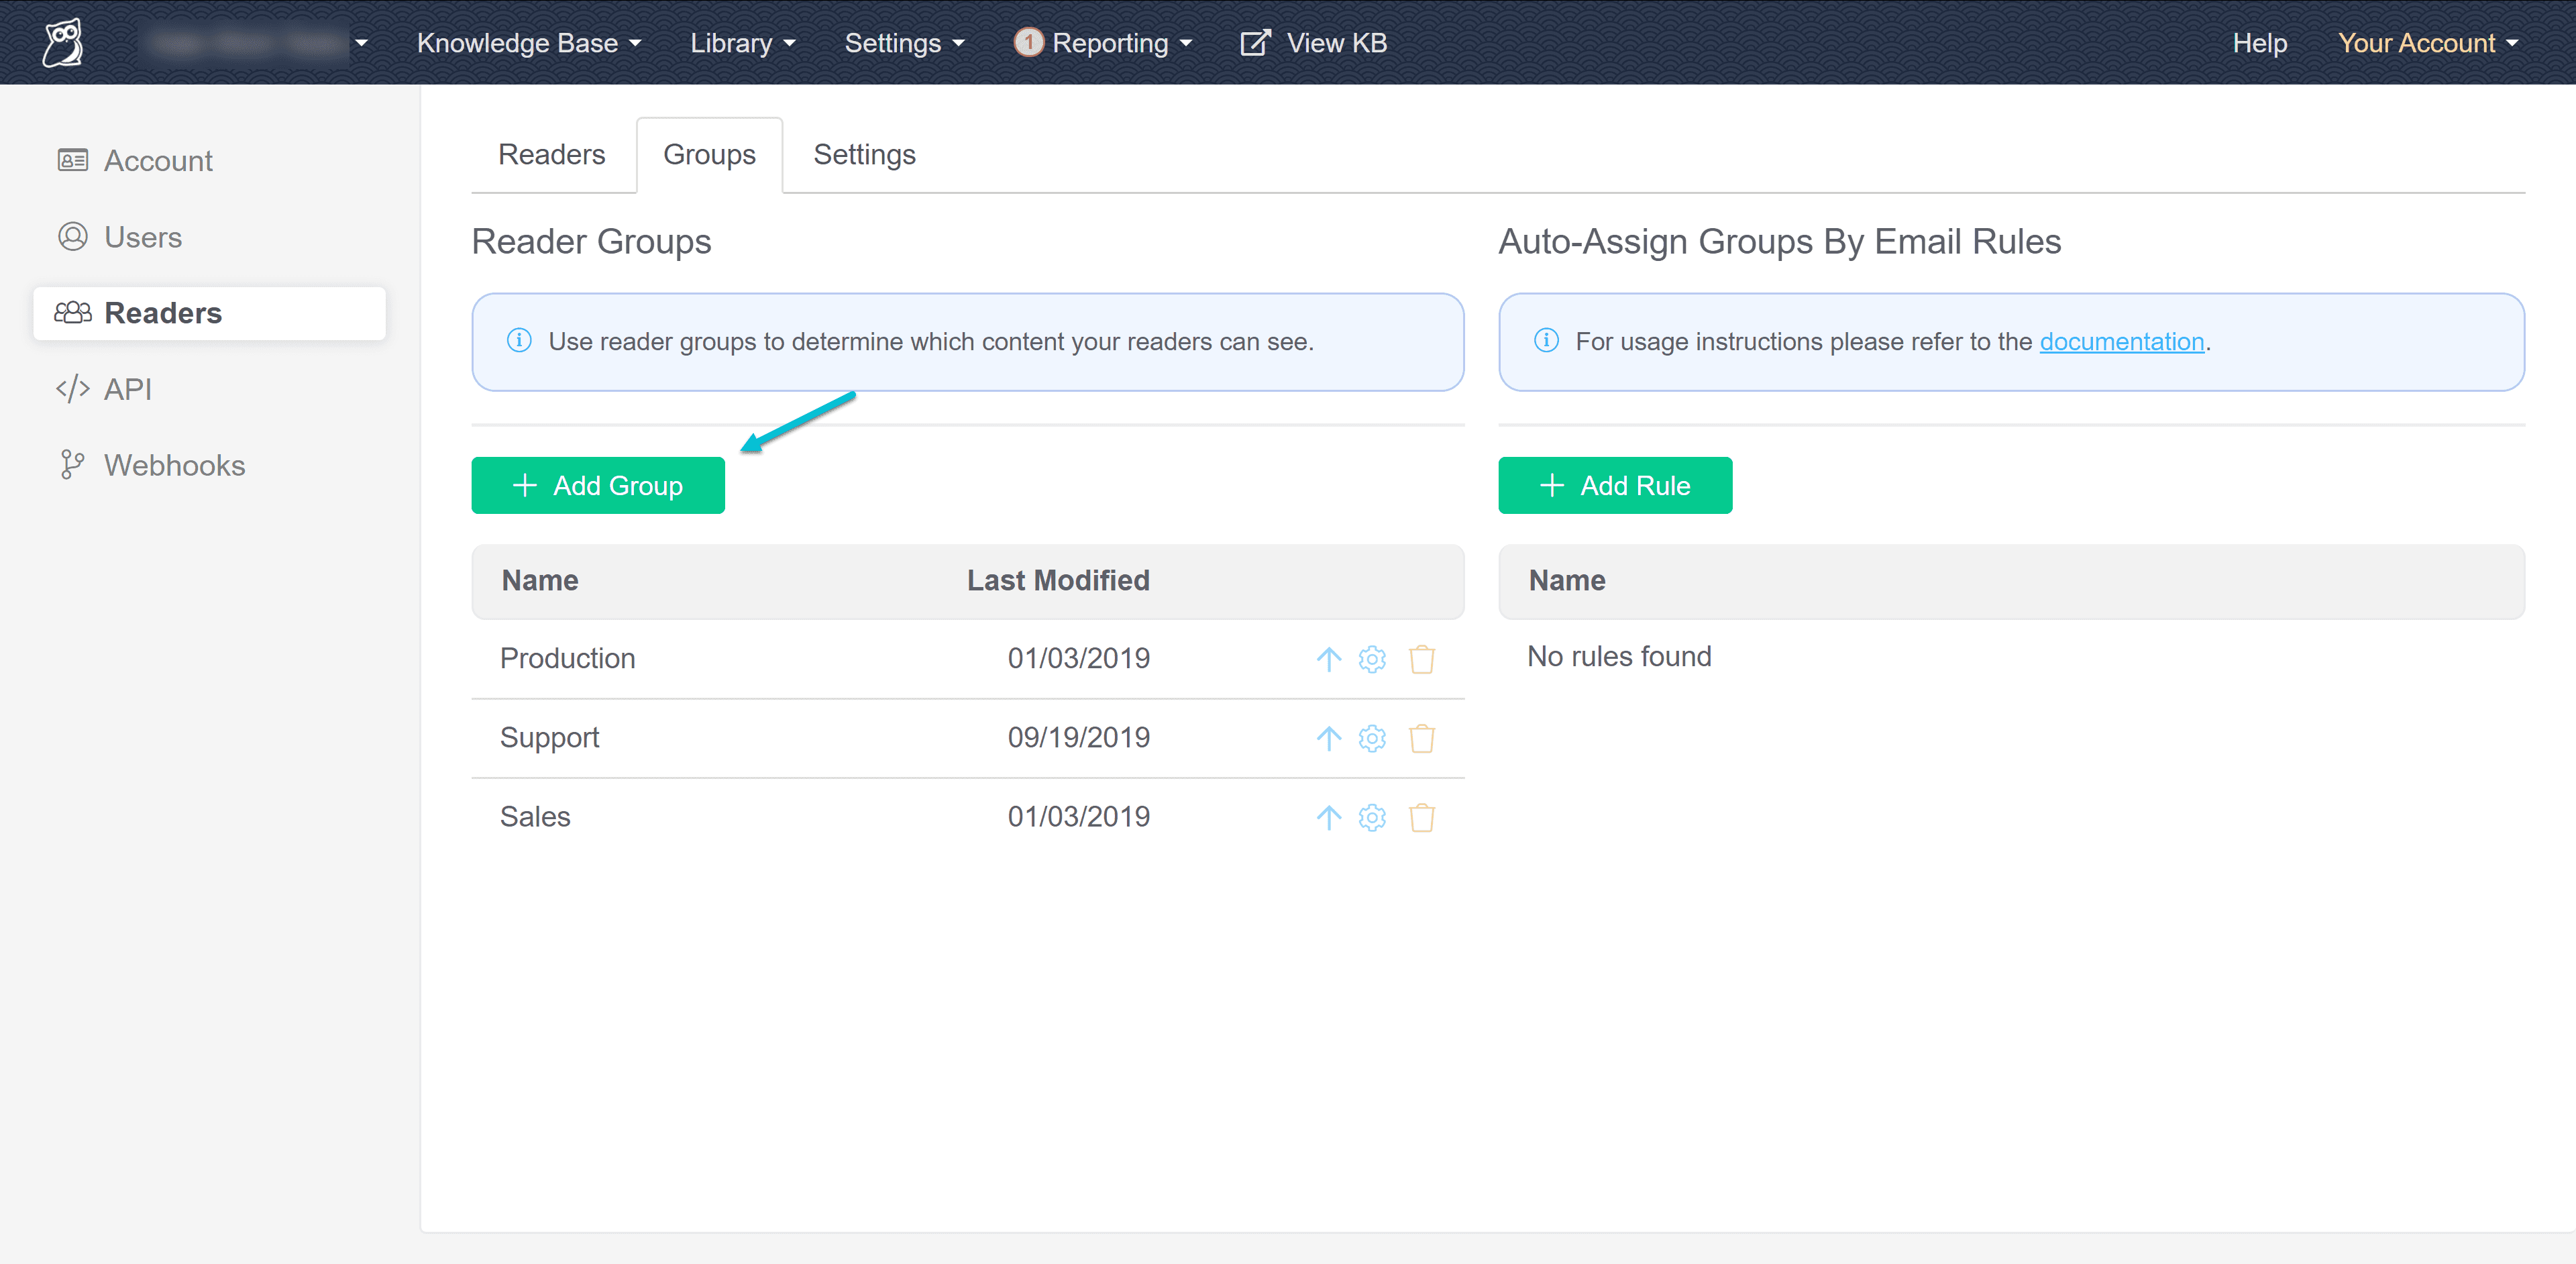
Create the groups you need
With the groups created, you can assign entire categories or individual articles to one or more groups using the Restrict to Groups section in the editor. Group restrictions cascade from category to article, so if I restrict my COVID-19 Updates category to only be visible to "Support", all the articles in that category will also only be visible to my Support group.
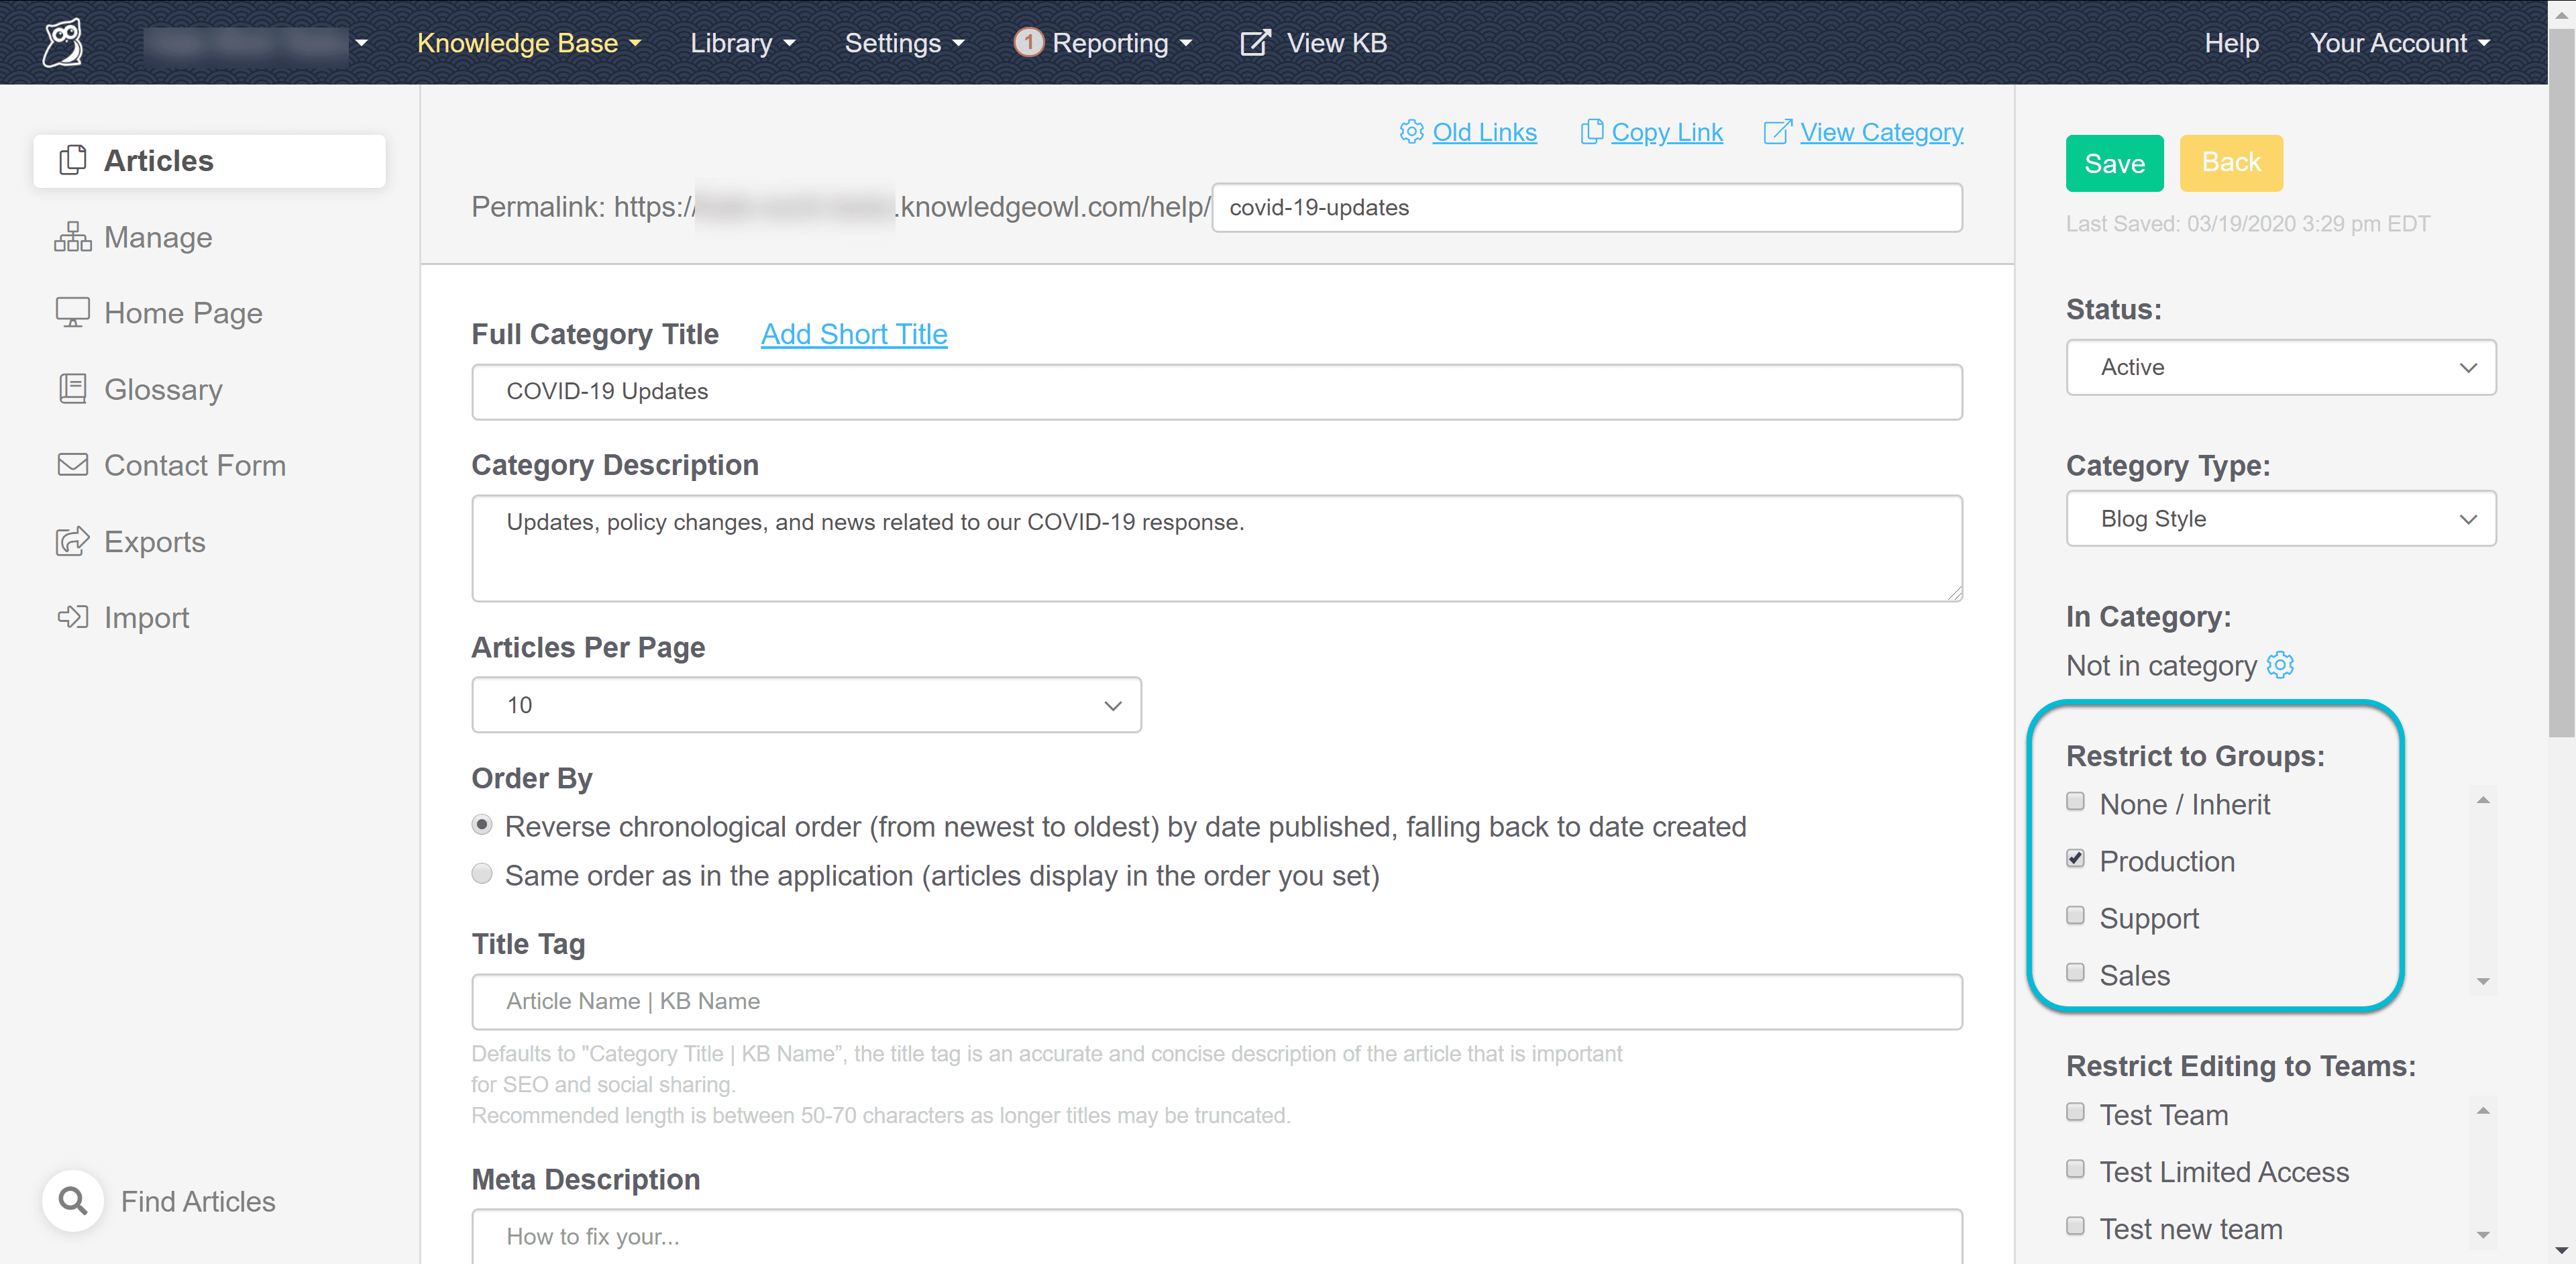
You can select one or more groups in the Restrict to Groups section of the editor
Assign your readers to the groups they belong to. (Or pass them over from your Single Sign-On integration.)
As a reader, when I login, I'll be able to see:
Content that is not restricted to any groups
Content that's restricted to a group I belong to
If content is restricted to a group I'm not a member of:
I won't see that content in the table of contents or on the home page
I won't see it in the autosuggest search or the full search results
If someone gave me a direct link to the content, I would only see a message that I don't have permission to view this content
You can test your group restrictions by clicking the View KB, View Category, or View Article links from within app.knowledgeowl.com and then clicking the Change Reader Groups option in the footer to select various groups and see what they can see.
Looking ahead
While we find ourselves in fairly uncertain times, please know that all the owls here at KnowledgeOwl are here to try to help your knowledge bases adjust to your immediate needs. Let us know if there are other changes we can help with, or if you'd like additional information on any features to get them configured and use-able as quickly as possible.
{{snippet.authorKateMueller}}
{{snippet.Disqus}}

Written by
Kate Mueller
Kate is KnowledgeOwl's Documentation Goddess & Resident Cheesemonger. She has led a checkered past, including teaching college-level English and being the head of product for another small software company. She LOVES cheese. In 2018, she hiked the entire Appalachian Trail, which inspired her to eat more cheese. At KnowledgeOwl, she writes our documentation and teaches Owlcademy classes and webinars. Outside of KnowledgeOwl, she advises on writing and documentation best practices as knowledge with sass and hosts The Not-Boring Tech Writer podcast. Connect with her on LinkedIn.

Follow these 3 steps to improve your knowledge base
1
Get expert tips every month in your inbox
No spam, pinky promise.


2
Try the knowledge base software your team will fall in love with
Reduce tickets, make information easy to find.
Happier employees, happier customers.

3
Become the tech writer everyone respects
Check out our podcast, The Not-Boring Tech Writer.

How teams are using KnowledgeOwl
Loved by 3,200+ knowledge base authors in software companies around the world


